Author: Tian Jiaoling
Preparation work
The doc is applied for deploying the target board for Estuary OS with iso file or upgrading any release version of Estuary OS with iso file.
The iso file the doc mentioned can be accessed by the Downloading website.
Accessing from China: ftp://117.78.41.188
Accessing from outside-China: http://download.open-estuary.org/Please make sure you have connected two or more disks to target board if you want to install two or more distributions.
For EOL1 (Open Lab 1), we provide to visit the board’s BMC IP both locally and remotely.
If you are in the same network segment with boards deployed in EOL1, you can visit the board’s BMC IP:
1https://192.168.1.<boardno>If you want to visit board’s BMC IP remotely, please input the following command in browser:
https://htsat.vicp.cc: <port><boardno>, the<port>is set to “40” by default.
e.g.1https://htsat.vicp.cc:40135For EOL2 (Open Lab 2), we only provide to visit the board’s BMC IP remotely.
BMC IP is set to:
1https://114.119.4.74:<port><boardno>The
<port>is set to “8” by default. For example, if you want to visit board 135’s BMC IP which located in EOL2, please inputhttps:114.119.4.74:8135in your browser.For the boards sent out, the BMC IP website is https://192.168.2.100 by default.
Details steps to deploy/upgrade Estuary OS
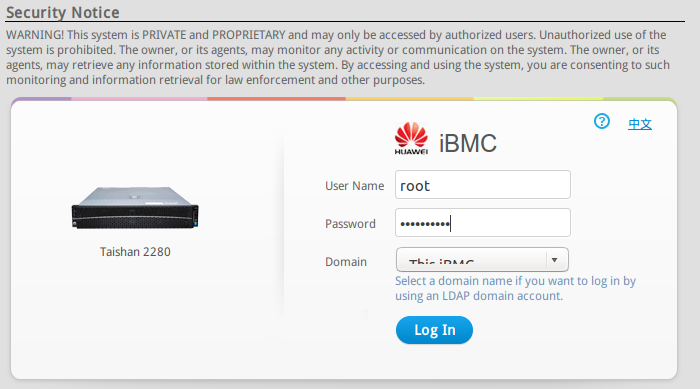
Open the browser and input the target board’s BMC IP
The username&password for logging the BMC website isroot&Huawei12#$
If the BIOS version is too low or damaged, please upgrade BIOS through BMC website. Click System->Firmware Upgrade->Select Target Version: (e.g.: bios-crypt-image-0928.hpm)->click “Start Update”.
Note: please use UEFI_D05.fd with specified Estuary version to contact UEFI developers for creating UEFI hpm files
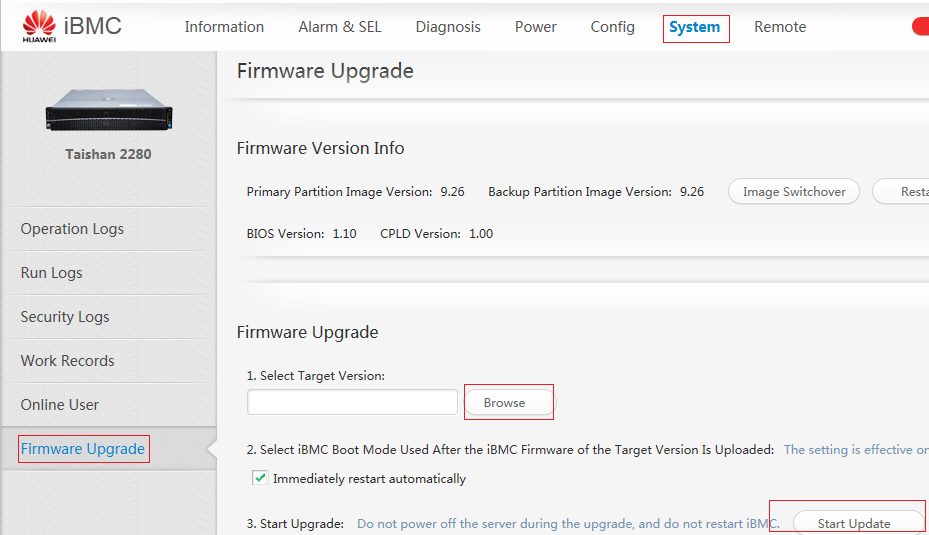
Please reboot the board to make sure the new BIOS invalid.
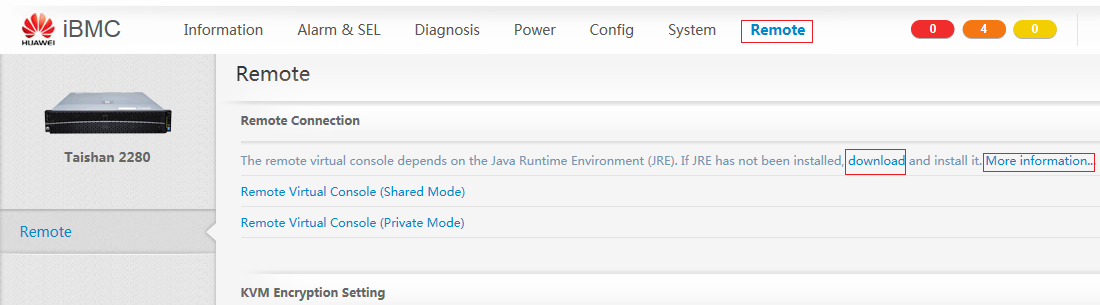
Click “Remote” at the top of BMC website
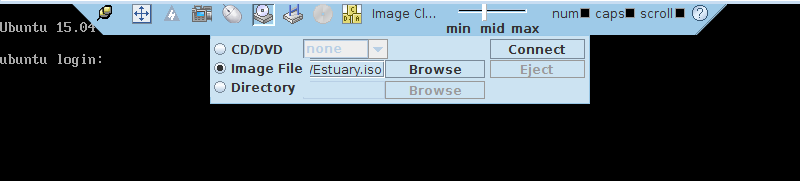
You will see the following picture. If you don’t see it, please install java virtual machine.
Select “Remote Virtual Console (Shared Mode)”
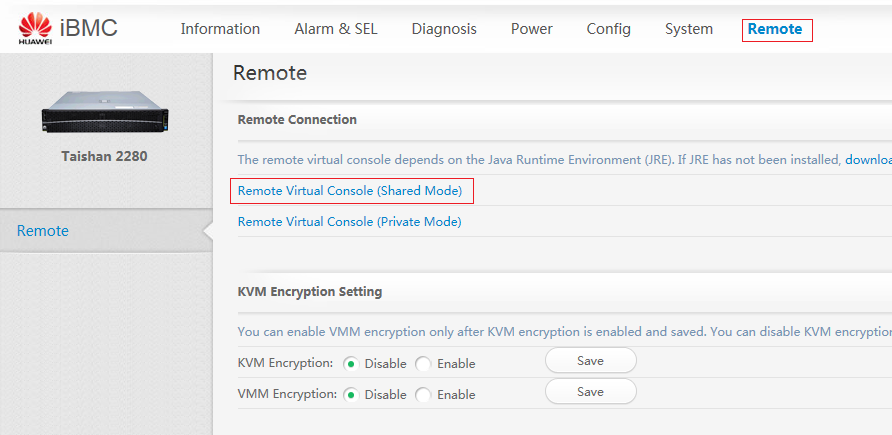
Click “Image File” and choose the iso image, then click “Connect” button.
Click “Config” on the top of BMC website, then click “Boot Option” to select “DVD-ROM drive”, continue to click “Save” button.
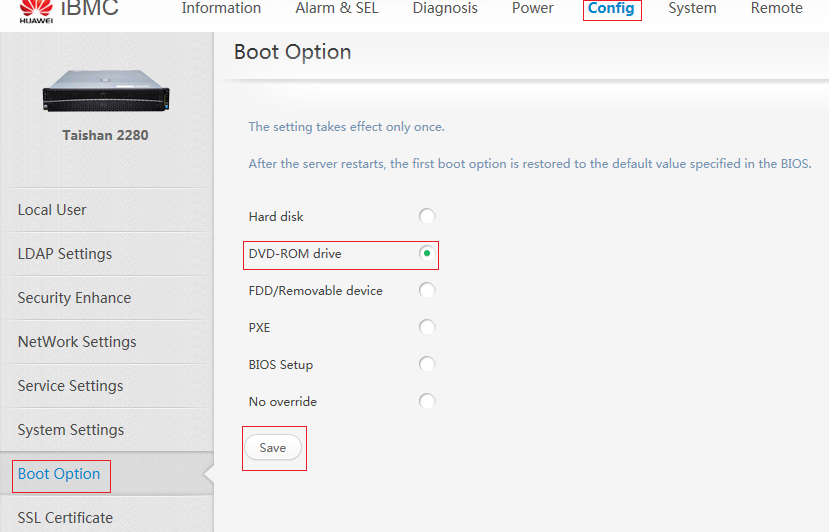
Warning: the modification is only valid this time, if you want to boot from the CD-ROM drive next time, you need login BMC to modify the system booting option
Force to restart D05 through virtual console. Click “power”->click “Forced System Reset”
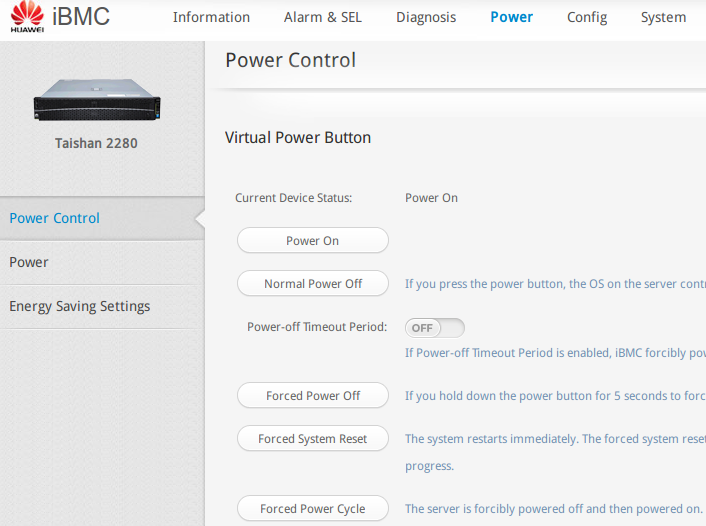
Warning: if you want to see the booting log of board, Please continue the step “How to use ipmitool to see booting log”.
How to use ipmitool to see booting log (Necessary step if you want to see the booting process of board)
First please install ipmitool with the following commands(Apply for ubuntu pc)
|
|
If your pc is windows system, please get ipmitool package from http://down.liangchan.net/ipmitool.zip. Then depress the package to your pc disk.
Open two terminals, one is to input the following commands to make the board power on or off.
e.g.:
Open the other terminal and input the following command to enable the board with command:
e.g.:
Enter UEFI menu
Press any key except “enter” key to enter UEFI menu when the screen echo Press any other key in 10 seconds to stop automatically booting
Choose “EFI USB DEVICE” and type “enter” key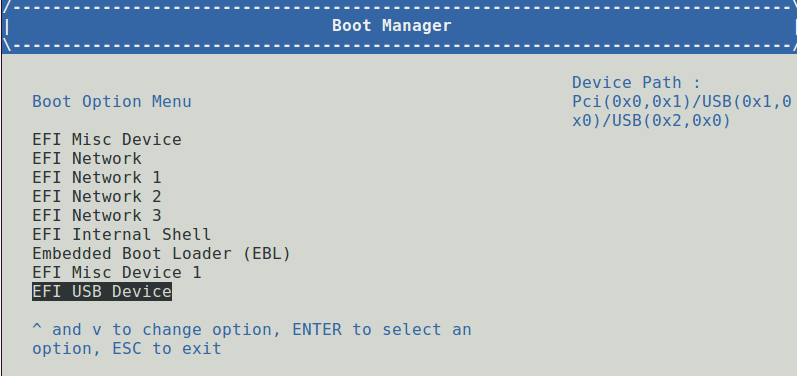
The system will enter grub menu as follow and show “Install D05 estuary (Console)”, press “enter” key to start install.
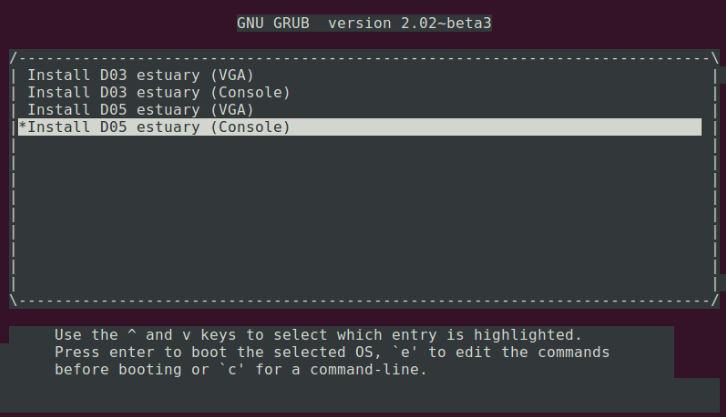
Warning: if you select “Install D05 estuary (Console)”, you can see the installing log from “ipmitool”. If you select “Install D05 estuary(VGA)”, you should connect a VGA and a mouse to the target board or via kvm on BMC website to see the installing log directly.
Please input “2” when the system echoes the following picture.

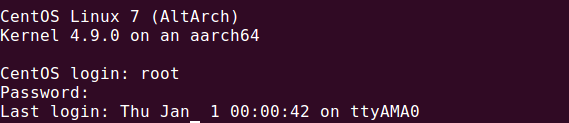
Please let the system deploy automatically without any manual operations. After all the deployments have done, the system will boot automatically. It has entered distribution successfully if you see e.g: root@CentOS. Username/password for all distribuitons is root/root by default.
FAQ
QES1: If you have done all the above operations, but enter the system which started with estuary@
ANS: Please check the following items.
- The iso file and BIOS file you used SHOULD keep complementary. That is to say, both two files came from the same Estuary release version.
- Make sure you have connect sufficient disks to the target board if you have installed more distributions.
QES2: I have entered the distribution successfully, but the system cannot support my needed functions
ANS: Please upgrade the OS to the newest Estuary release version according to the “Downloading website“ which mentioned at “preparation work” chapter. If the issues still not reslove, you can send email to support@open-estuary.org.